
You Access this page through the B2B Admin Tabs. From here you can manage what funder companies are in the system, you can change their name, view their details such as their address and their references. You can also manage the privileges which determines what users can see that information.
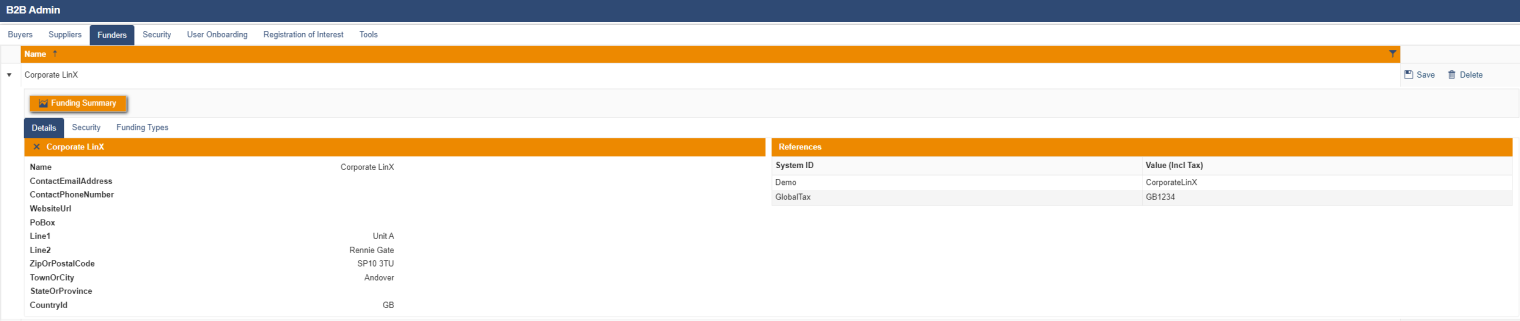
When you access the funders tab, you’re greeted with something that looks like this:

This grid contains any funder companies that have been imported into the system.
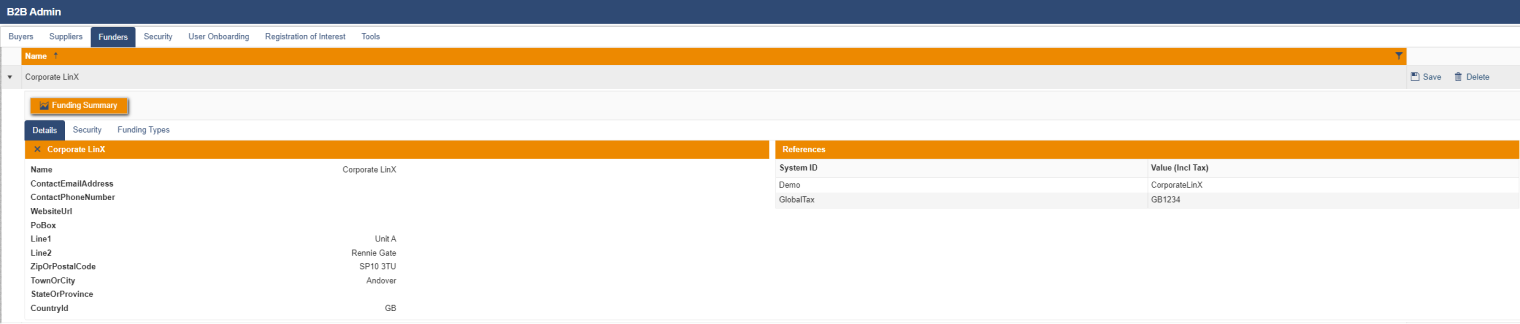
On expanding a funder company, you can see the company’s information such as their address and their references.
Within this tab, you can set up the roles within the company and assign the appropriate users to them. This is done during the user onboarding process and it will determine what data a particular user can see in the UI when they are logged in.
Here is where you set up the funding details, meaning the rules to be followed for that company during offer generation.

Clicking the “Add” button will bring up a dialog that looks something like this:
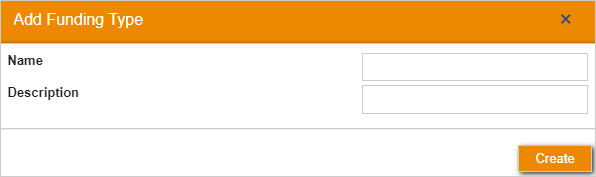
Filling in the “Name” and the “Description” and then clicking create will add your new funding type to the UI. Once you’ve created it you can expand it and manage the rules that it will need to follow during offer generation and the supplier companies that those rule sets should apply to.
Expanding the systematic funding type looks something like this:
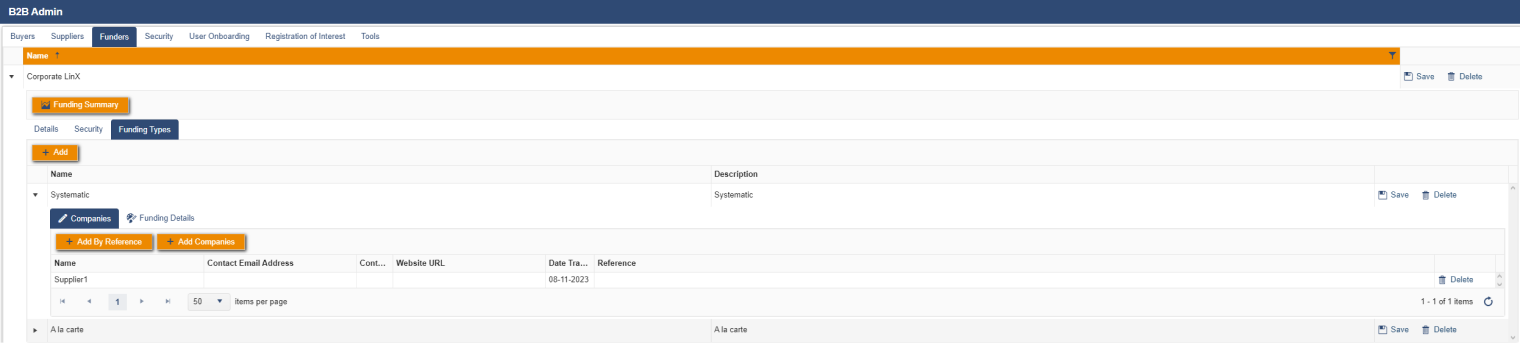
The “Companies” tab is where you input the companies that you want this particular funding type to apply to. You can add these companies in two different ways. When clicking the “Add by Reference” button, you get a dialog that looks something like:
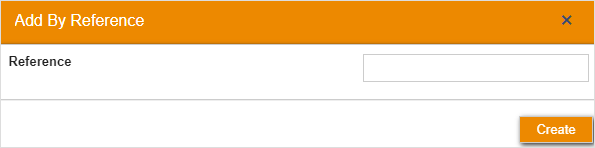
To add a company using this dialog, you must enter their company reference and it must follow the pattern of SourceSystem|CompanyReference OR GlobalTax|TaxReference. Missing the first part will mean that you cannot add the company to the funding type. As an example, for the demo portal, it would follow the pattern of Demo|GB1234 where Demo is the source system and GB1234 is the company’s reference. If you click on the “Select Companies” button, it will bring up a dialog that looks like this:
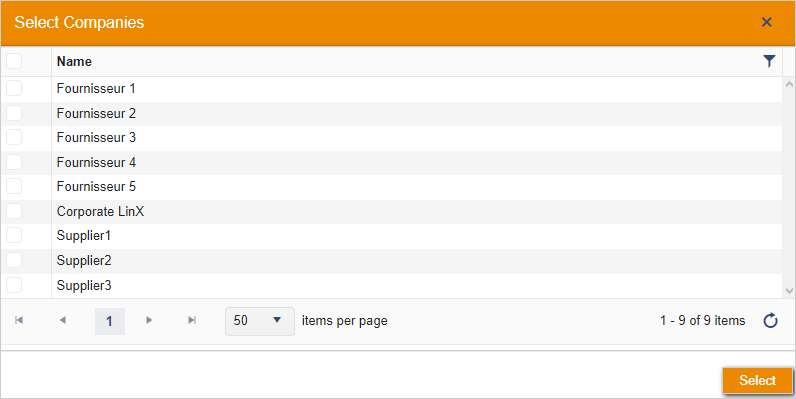
In this dialog, you can select which companies you want to add to the funding type. This is a much simpler method to add the companies and it does not require you to know their references beforehand. It’s a much simpler way to add multiple at a time.
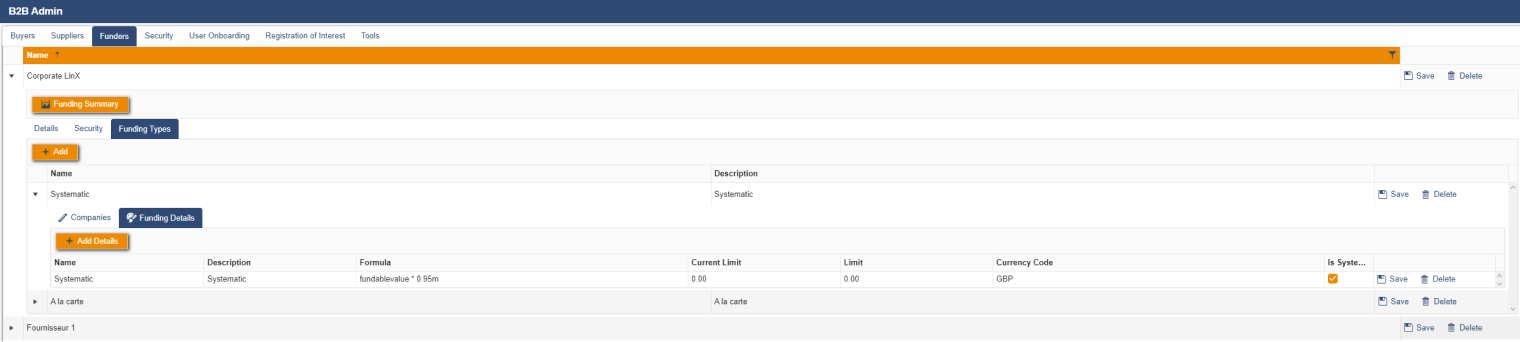
This is where you can view and edit the “rules” for offer generation. The “Name” is typically the name of the type of funding, however this can be broken down to whatever the client’s specific needs are. The “Description” can contain any important information about the funding details; they may contain an explanation of the specific circumstances that formula is used for example. “Formula” is the formula that our system uses to determine the early payment offer value. In this case, the systematic offers will use the fundablevalue * 0.95m. Fundable value is set on a transaction and it is visible on the transaction’s details. Of course, “Currency” is the currency that any systematic offers (in this case) will be generated in.
“Limits” can be set, such that when offers are accepted, you can accept offers up to a certain max value, for example if this is set to 1,000,000 GBP then it will accept all offers (working from the lowest value offer to the highest) up to that value such that it will not exceed the 1,000,000 GBP.
To create a new set of “rules” for offer generation, you can click the “Add Details” button. This will bring up a dialog that looks like this:
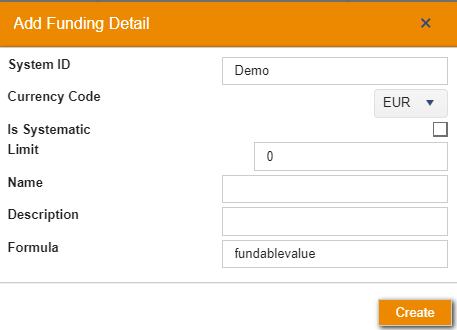
Here you fill in the information that’s explained above, once you’ve populated the fields and hit the create button, your funding details will be visible in the UI and those “rules” will be taken into account the next time that offer generation is run.
Going back up to the main companies grid, to update the name of a company, you click on the relevant row in the grid and it will become editable.

To save any changes you’ve made you click the “Save” button on the relevant row. This will save any changes you’ve made to this company.
