Corporate LinX - Documentation Library
Accessing Mail Management
You access this functionality through the App Management Tabs. From here, you can see any emails that have been sent from our system. These could be password reset emails, registration emails or just the usual registration emails.
The UI
When you access the mail management tab, you’re greeted with something that looks like this:

Here, you would see any emails that were due to be sent out. As this is our demo system there are currently none as not many people use the site from a day to day basis.
History Tab
In the history tab, you can view any emails that have been sent out by our system previously and it looks something like this:
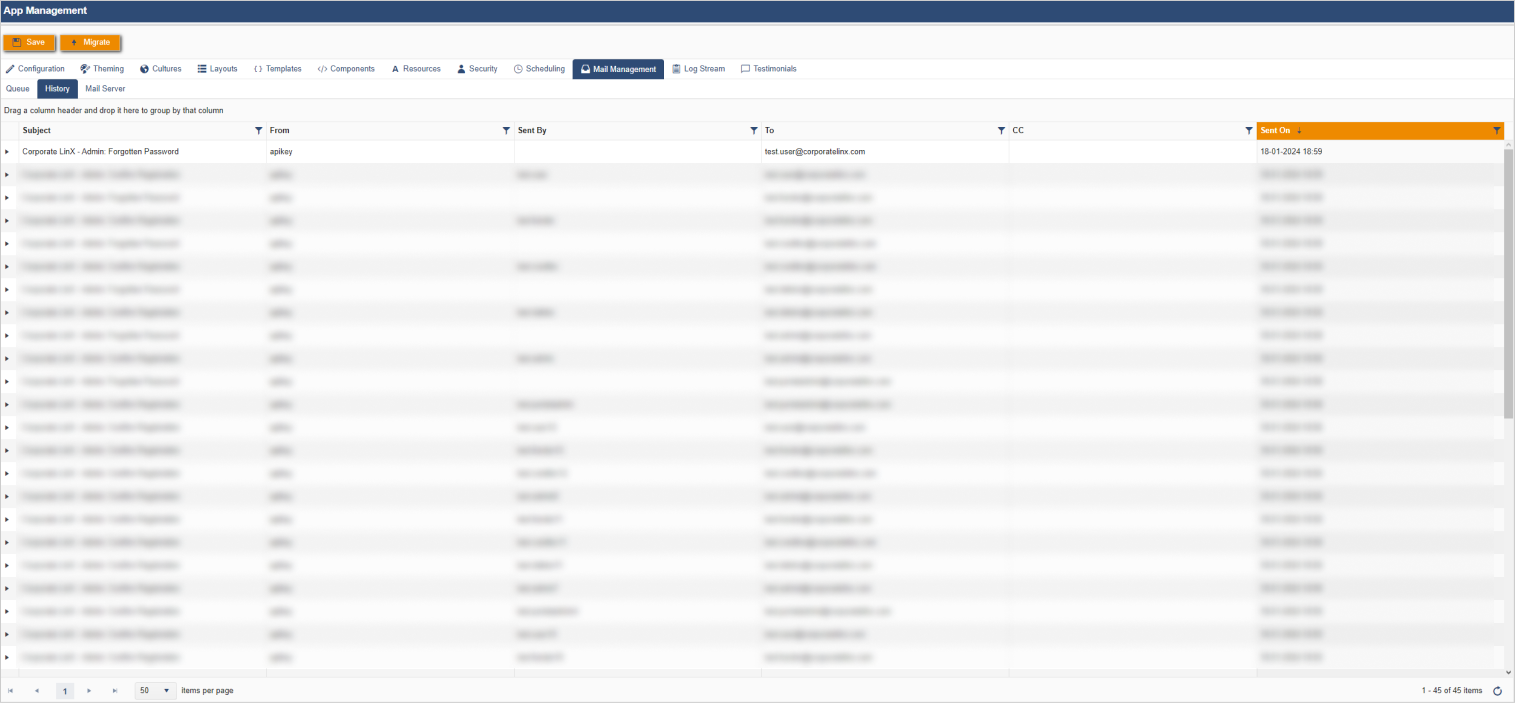
The columns show:
- Subject - the reason why the email was sent,
- From - where the email was sent from,
- To - the email address it was sent to,
- Sent On - the date that the email was sent out to the user.
Expanding one of these rows will display the content of the email that was sent out to the user at that time.
Mail Server Tab
This tab is for configuring the mail accounts that the app can use to send emails out.

Creating a Mail Server
To set up a new in this UI, you click on the “New” button in the header bar of the mail server grid. Clicking this will bring up a dialog that looks something like this:
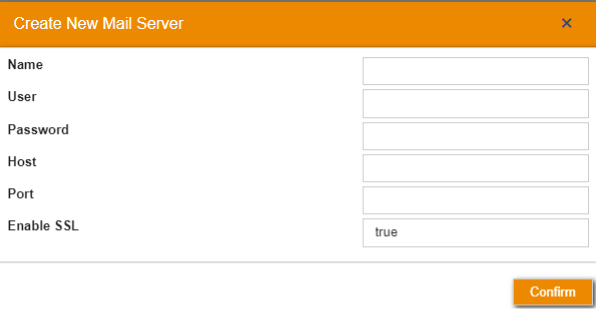
Here, “Name” represents the name you want to give to your mail server and you may want it to be relevant to that app you are in. “User” is the email address you wish the emails to be sent from and “Password” is the password for that email account. “Host” is the name of the host which is used to send emails and “Port” is the communication endpoint which is usually set to 25. In the “Enable SSL” box, you can either set this to true or false, as you can see it’s set as true be default.

For now, I have created a test mail server. On this row you can see that there are save and delete functions.
Updating a Mail Server
You edit mail servers by just clicking onto the field you want to change.

Once you’ve made any changes you want, you click the “Save” button on the corresponding grid row and any changes you’ve made will be saved.
Deleting a Mail Server
To delete a mail server that you no longer want to use in this app, then you click the “Remove” button that will remove your schedule and its content from the UI.
