Corporate LinX - Documentation Library
Accessing Layout Management
You Access this page through the App Management Tabs. From here you can manage the app’s layout, where you can alter the app’s logos and their placements and you can manage their sites navigation bar styles.
The UI
When you access the layouts tab, you’re greeted with something that looks like this:

This grid contains any relevant layouts, which can be set on a page-by-page basis, for example, the documentation pages you’re looking at right now will have a different layout to the app’s home page.
Creating a Layout
To create a new layout in this UI, you click on the “New Layout” button in the header bar. Clicking this will bring up a dialog that looks something like this:
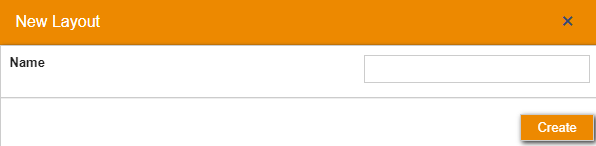
Creating a Layout in our system is incredibly simple & only requires you to give it a name. The name should be relevant to what the layout is going to be used for. Once you’ve filled in the field, you can press create and create your new layout.

For now, I have created a Test layout. On this row you can see that there are save and delete functions and there’s the ability expand the component.
Updating a Layout
On expanding a new layout, you will come across 2 boxes in which you can implement your layout. In the header box, you will typically find any required and tags for any pages that use that particular layout. In the body box, it’s a simple breakdown of the page layout - header, body and footer and all of the page’s content get’s populated into the page’s body.
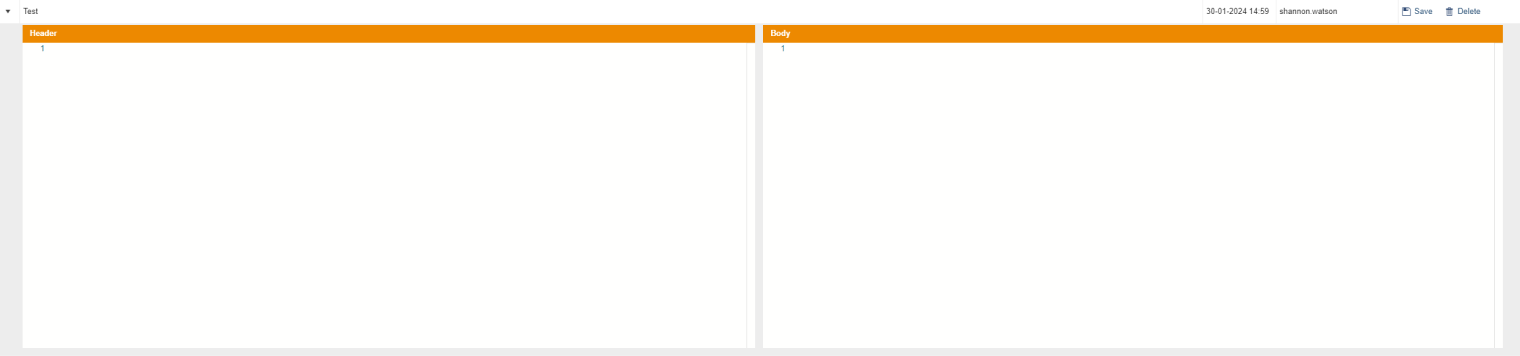
To save any changes you’ve made within a layout you click the “Save” button on the relevant row. This will save any changes you’ve made to this layout.
Deleting a Layout
To delete a layout that you no longer use or need, then you click the “Delete” button that will remove your layout and its content from the UI.
